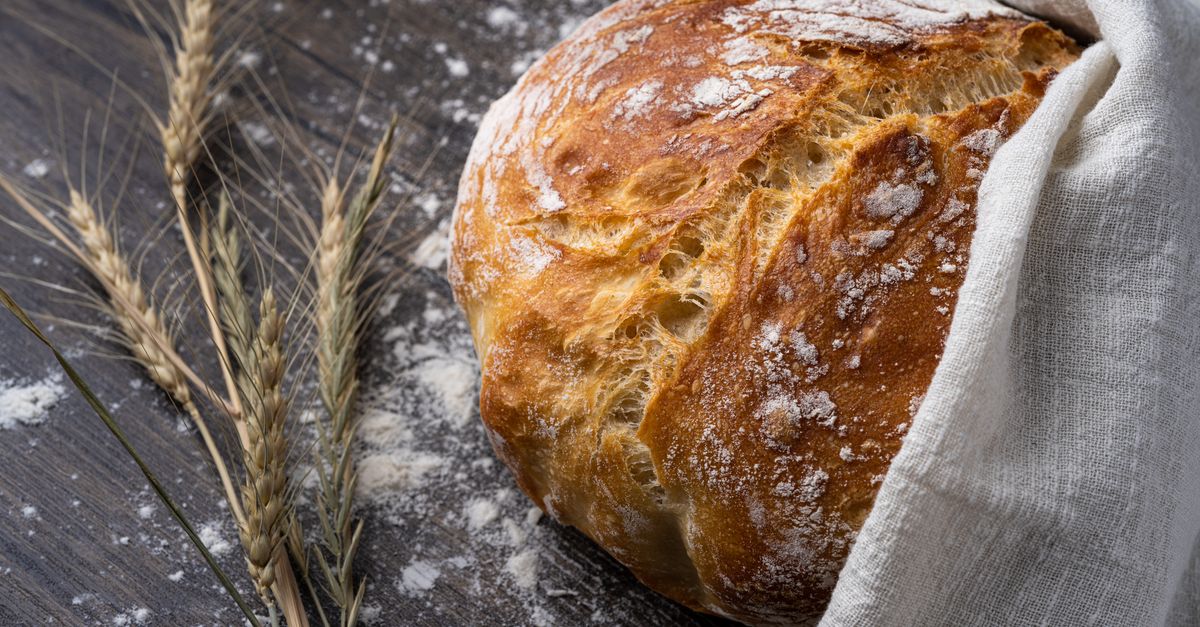
Why Your Homemade Bread Is Dry and Crumbly (And The Simple Shifts That Guarantee Light, Airy Perfection Every Time)
Every home baker dreams of pulling a perfectly golden loaf from the oven — crusty on the outside, soft and airy within. But if you’re like most people I talk to, your reality might be closer to a dense, dry, and crumbly brick that’s more suitable for croutons than a sandwich. I’ve been there. For years, my kitchen smelled amazing while the bread baked, only for disappointment to set in with the first slice. It was frustrating, expensive in wasted ingredients, and frankly, a confidence killer.
I used to blame the recipe, the yeast, even my oven. I followed instructions to the letter, yet my bread consistently emerged heavy, with a tight crumb and a dryness that no amount of butter could truly mask. The problem, I eventually discovered, wasn’t a single catastrophic error but a series of subtle, often overlooked mistakes in both ingredient handling and technique. What truly changed everything for me wasn’t a secret ingredient or a fancy new gadget, but a deeper understanding of how these elements interact to create that elusive perfect loaf. This isn’t about complex science; it’s about practical, actionable shifts that will elevate your homemade bread from ‘just okay’ to ‘absolutely incredible,’ every single time.
Key Takeaways
- Ensure proper hydration by measuring flour by weight, not volume, and being ready to adjust water content based on flour type and environment.
- Develop gluten fully through adequate kneading and strategic resting periods to build a strong, elastic structure that traps gas for an airy crumb.
- Control fermentation with precise temperature and timing, as under- or over-proofing can lead to dense, crumbly bread.
- Incorporate enrichment ingredients like fats and dairy mindfully to enhance tenderness and moisture, avoiding excessive additions that can inhibit gluten formation.
- Master baking temperature and humidity to achieve a beautiful crust and a moist interior, preventing excessive moisture loss during the bake.
The Fatal Flour Measurement Flaw: Why Your Scale Is Your Best Friend
When I first started baking, I swore by volumetric measurements – cups, teaspoons, the whole nine yards. Every recipe called for “3 cups of all-purpose flour,” and I dutifully scooped. The result? Inconsistent, often dry, bread. The mistake I see most often is relying on cup measurements for flour, which is a notorious culprit for variability.
Here’s the inconvenient truth: A cup of flour can weigh anywhere from 120 grams to 160 grams depending on how you scoop it – whether it’s sifted, spooned, or packed. That’s a massive difference in hydration ratio. Imagine a recipe calling for 3 cups of flour and 1 cup of water. If your 3 cups of flour are on the heavier side (say, 480g), your bread will be significantly drier than if they’re on the lighter side (360g). This inconsistency directly translates to a dry, dense crumb. My loaves dramatically improved the moment I invested in a simple digital kitchen scale and started measuring everything, especially flour and water, by weight.
What changed everything for me was standardizing my flour measurement to weight. Most professional bakers and modern recipes specify flour in grams for a reason. For all-purpose flour, a standard gram weight per cup is typically around 120-125g. By consistently weighing your flour, you eliminate the biggest variable in your dough’s hydration. Beyond that, pay attention to the type of flour. Whole wheat flour absorbs significantly more water than all-purpose flour due to its bran content. Even ambient humidity can affect how much water your flour needs. Don’t be afraid to add a tablespoon or two more water than the recipe calls for if your dough feels too stiff and dry during mixing. A slightly stickier dough almost always yields a more tender, airy crumb. Aim for a dough that is soft, pliable, and just slightly tacky to the touch. This high-hydration approach is a game-changer for moisture and openness in the crumb structure.
The Gluten Development Gap: Knead for Elasticity, Not Just Smoothness
Many home bakers, myself included in my early days, stop kneading the moment the dough looks smooth and coherent. But a smooth exterior doesn’t automatically mean your gluten is fully developed. Undern-kneading is a primary reason for crumbly bread, as the gluten network is simply not strong enough to trap the gases produced by yeast, resulting in a dense, tight, and breakable structure.
In my experience, thinking of kneading as building a springy, elastic net, rather than just mixing ingredients, completely shifted my results. Gluten, the protein network formed when flour and water combine and are worked together, is what gives bread its structure and elasticity. Without a strong gluten network, your dough can’t hold the CO2 bubbles produced by the yeast, leading to a tight, crumbly texture. You need to develop that network until it’s robust and flexible.
To truly develop gluten, you need to knead longer than you might think. For most lean doughs (flour, water, yeast, salt), this means 8-12 minutes by hand, or 6-8 minutes in a stand mixer on medium speed. The windowpane test is your ultimate guide: tear off a small piece of dough (about a golf ball size) and gently stretch it with your fingers. If you can stretch it thin enough to see light through it without it tearing, your gluten is sufficiently developed. If it tears easily, keep kneading. Additionally, incorporate sufficient rest periods. A 10-15 minute rest (autolyse) after mixing flour and water, before adding salt and yeast, allows the flour to fully hydrate and gluten development to kickstart naturally, leading to less kneading time. Similarly, a bulk fermentation (first rise) that is too short won’t allow the gluten to relax and strengthen, hindering the dough’s ability to stretch and hold shape during the second rise and baking.
The Fermentation Fiasco: Timing Your Proof for Perfection
Fermentation is where the magic happens – yeast consumes sugars and produces carbon dioxide, which gives bread its rise and flavor. But this magic is highly sensitive to time and temperature. The mistake I often see, and certainly made myself, is under-proofing or, less commonly, over-proofing the dough. Both lead to disastrous results, typically resulting in a dry, dense, or crumbly loaf.
What changed everything for me was understanding that fermentation isn’t just about size, but about the dough’s internal structure and strength. An under-proofed dough hasn’t produced enough gas, or its gluten hasn’t fully relaxed to capture those gases. The result is a dense, often crumbly loaf that feels heavy in the hand. An over-proofed dough, on the other hand, has exhausted its yeast, and the gluten structure has weakened and collapsed. This can also lead to a dense, sometimes sour, crumbly bread that lacks oven spring.
The key is to pay attention to both visual cues and the poke test. During the first rise (bulk fermentation), dough should generally double in size. For the second rise (final proofing), the poke test is more reliable: gently press a floured finger into the dough about half an inch deep. If the indentation springs back immediately, it’s under-proofed. If it stays indented and doesn’t spring back at all, it’s over-proofed. If it springs back slowly, leaving a slight indentation, it’s perfectly proofed. Ambient temperature plays a huge role here. A warm kitchen (75-80°F / 24-27°C) will accelerate fermentation, while a cool one (65-70°F / 18-21°C) will slow it down, often developing more complex flavors. Adjust your timing accordingly, and don’t blindly follow recipe times. Learn to read your dough.
The Enrichment Equation: Balancing Fats and Dairy for Tenderness
Many recipes for softer, richer breads call for additional ingredients like milk, eggs, butter, or sugar. These are known as enrichment ingredients, and their purpose is to tenderize the crumb, add flavor, and improve keeping qualities. However, the mistake I see, and once made myself, is adding too much of these or at the wrong stage, thinking more equals better. An excess of fat or sugar can actually inhibit gluten development, leading to a weaker structure and, you guessed it, a dry, crumbly loaf.
In my experience, understanding the role of each enrichment ingredient transformed how I approached enriched doughs. Milk, for example, contains lactose (a sugar that doesn’t get fully consumed by yeast) and proteins that contribute to a softer crust and crumb. Eggs add richness, moisture, and help with browning. Butter tenderizes the crumb and adds flavor, while sugar provides food for yeast, aids browning, and keeps the bread moist.
The secret to success with enrichment is mindful addition. For fats like butter or oil, it’s often best to knead them in after some initial gluten development has occurred. Adding them too early can coat the flour proteins, preventing them from forming gluten effectively. A good rule of thumb is to mix your dough, knead it for 3-5 minutes until it’s somewhat cohesive, then gradually incorporate softened butter or oil. The dough might seem to separate at first, but keep kneading, and it will eventually come back together, stronger and more pliable. For milk, use it as part of your liquid calculation, ensuring overall hydration remains balanced. Don’t go overboard with sugar, as too much can inhibit yeast activity through osmosis, leading to a slow or stalled rise. A balanced approach ensures these ingredients enhance, rather than hinder, your bread’s texture and moisture.
The Oven Environment Enigma: Heat and Steam for the Perfect Crust and Crumb
Baking the bread is the grand finale, and the oven environment plays a critical, yet often underestimated, role in preventing dryness and promoting a beautiful, airy crumb. A common mistake is simply throwing the loaf into a preheated oven without considering steam and consistent temperature. Without adequate steam, the crust forms too quickly and rigidly, preventing the final expansion (oven spring) and trapping moisture unevenly. Inconsistent temperature, on the other hand, can lead to uneven baking, leaving some parts dry while others are undercooked.
What fundamentally changed my bread baking was treating my home oven like a mini bakery, controlling both heat and humidity. That initial burst of steam is crucial. It keeps the crust soft and pliable for the first 10-15 minutes of baking, allowing the dough to expand fully before the crust sets. This leads to a larger, more open crumb and a thinner, crisper crust. Without it, the crust sets prematurely, creating a dense, often dry interior.
To achieve bakery-quality results, preheat your oven to a higher temperature than the recipe suggests (e.g., 500°F/260°C for 30 minutes), then lower it to the specified temperature (e.g., 425°F/220°C) when you put the bread in. This ensures your oven is truly hot and has good thermal mass. For steam, place a cast iron pan or an old oven-safe pan on the bottom rack while preheating. Just before you put the bread in, carefully pour about 1 cup of boiling water into the hot pan and quickly close the door. Bake with steam for the first 10-15 minutes, then remove the pan of water and continue baking until the bread is golden brown and reaches an internal temperature of 200-210°F (93-99°C). A baking stone or steel can also significantly improve crust development by providing a consistent, high heat source directly to the bottom of the loaf. Don’t underestimate the power of a thermometer; visual cues are good, but internal temperature guarantees doneness without over-baking and drying out your loaf. And finally, resist the urge to slice into your bread immediately after it comes out of the oven! Let it cool completely on a wire rack. This crucial cooling period allows the starches to set and the internal moisture to redistribute, preventing a gummy texture and further drying out.
Frequently Asked Questions
Q: My bread is always dense, not airy. What’s the most likely culprit?
A: The most common reasons for dense bread are under-kneading (insufficient gluten development) or under-proofing (not enough fermentation time for the yeast to produce gas and relax the gluten). Revisit the windowpane test for kneading and the poke test for proofing to ensure both stages are adequately completed.
Q: How can I tell if I’m adding enough water without making the dough too sticky?
A: Start by measuring flour and water by weight. As you mix, observe the dough. It should come together and feel soft, pliable, and slightly tacky, but not so sticky that it smears everywhere or cannot be handled. Different flours absorb water differently, so be prepared to add a tablespoon of water at a time if it feels too stiff, or a sprinkle of flour if it’s too wet. Experience will be your best guide here.
Q: What’s the ideal temperature for proofing dough to avoid dryness?
A: A moderate temperature of 70-75°F (21-24°C) is generally ideal for proofing. This allows the yeast to work effectively without over-activating and producing too quickly (which can lead to over-proofing and weakened gluten) or too slowly. A cooler proof (around 65°F/18°C) will take longer but can develop more complex flavors, while warmer temperatures will speed things up.
Q: Should I add extra fat like butter or oil for a moister crumb?
A: Enrichment ingredients like butter and oil can certainly enhance moisture and tenderness, especially in enriched doughs like brioche or challah. However, for lean breads, too much fat can inhibit gluten development. If you’re struggling with dryness, first focus on proper hydration, kneading, and proofing. If you still want to enrich, add fat gradually after initial gluten development and in moderation (e.g., 1-2 tablespoons per loaf).
Q: My crust is always too thick and hard, and the inside is dry. What am I doing wrong?
A: This is often a sign of insufficient steam in the oven during the initial baking phase. Without steam, the crust sets too quickly, preventing the dough from expanding fully and locking moisture inside. Use a method to create steam (like boiling water in a hot pan) for the first 10-15 minutes of baking. Also, ensure you’re not over-baking the bread; check for an internal temperature of 200-210°F (93-99°C) with an instant-read thermometer.
Crafting the perfect loaf of homemade bread is incredibly rewarding, and it’s a skill that truly transforms your kitchen and your meals. By focusing on these fundamental shifts – precise flour measurement, thorough gluten development, accurate fermentation timing, mindful enrichment, and controlled oven environment – you’ll move past the frustration of dry, crumbly loaves. Trust me, these aren’t just tips; they are the pillars upon which every truly great loaf is built. Take these lessons to your next baking session, and prepare to enjoy the light, airy, and moist perfection you’ve been dreaming of. Your taste buds (and your family) will thank you.
Written by Lena Petrova
home organization & sustainable living
A veteran journalist with an eye for practical solutions and a passion for simplifying complex topics.
You Might Also Like

Why Your Homemade Pizza Crust Isn't Crispy (And The Pro Secrets That Deliver Pizzeria-Quality Crunch Every Time)
Tired of soggy pizza crust? Discover the common mistakes that steal your crunch and the pro secrets to achieve a perfectly crispy, pizzeria-quality crust at home.
Why Your Homemade Brownies Are Chalky (And The Simple Shifts That Guarantee Fudgy Perfection Every Time)
Stop settling for dry, chalky brownies. Discover the precise shifts in ingredients and technique that guarantee rich, fudgy brownies every single time.

Why Your Home Still Feels Stuffy (Even with Windows Open) — And What Actually Works for Real Fresh Air
Discover why opening windows isn't enough for fresh air and the hidden culprits making your home stuffy. Get expert tips for real air quality.