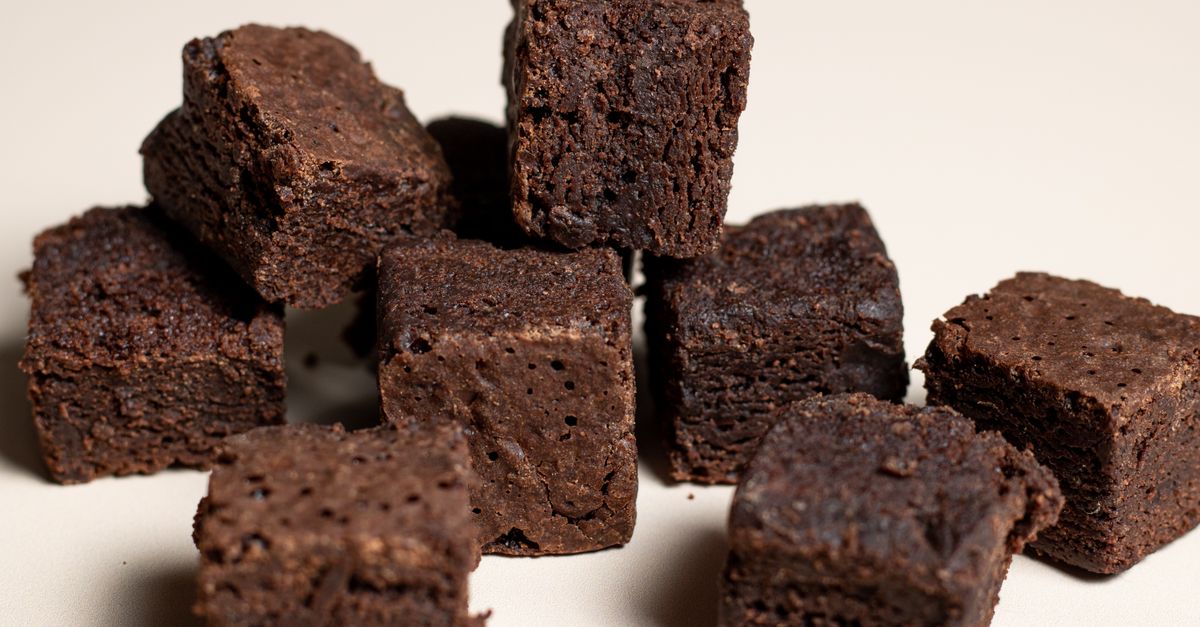
Why Your Homemade Brownies Are Chalky (And The Simple Shifts That Guarantee Fudgy Perfection Every Time)
There’s a special kind of disappointment that hits when you bite into a homemade brownie, expecting a rich, dense, chocolatey hug, and instead, you get… chalk. It’s dry, it’s crumbly, it absorbs all the moisture from your mouth, and it leaves you wondering if you even like brownies anymore. I’ve been there, more times than I care to admit. For years, my brownies swung wildly between bland and brick-like, never quite hitting that elusive fudgy sweet spot. I tried countless recipes, convinced it was just a bad formula, but the truth, I discovered, lay not just in the recipe, but in subtle, often overlooked shifts in technique and ingredient understanding.
This isn’t about some fancy secret ingredient or a complicated, multi-step process. It’s about understanding the science of the brownie and making deliberate choices that steer you away from chalky despair and straight into fudgy nirvana. What changed everything for me was realizing that the common pitfalls – overmixing, wrong fat ratios, and incorrect baking temperatures – were silently sabotaging my efforts. Once I addressed these, my brownies transformed from forgettable failures to absolute showstoppers, with that coveted crackly top and intensely moist, dense interior that truly melts in your mouth.
Key Takeaways
- Prioritize fat over flour and use a mix of butter and neutral oil for optimal fudginess and flavor depth.
- Gently warm butter with sugar, then add eggs one by one, to emulsify properly and create that signature crackly top.
- Avoid overmixing the dry ingredients at all costs; fold them in minimally to prevent gluten development and a cakey texture.
- Bake brownies at a slightly lower temperature for a shorter duration, relying on the visual wobble test for perfect doneness.
The Overlooked Fat Ratio: Why Butter Alone Isn’t Always Enough
The biggest mistake I see most often in home baking, particularly with brownies, is relying solely on butter as the fat source. While butter brings incredible flavor, it has a relatively high water content (around 15-20%) and a lower smoke point. For that truly fudgy texture, you need a higher concentration of fat and a fat that remains liquid at room temperature. This is where a strategic blend of butter and neutral oil becomes a game-changer.
In my experience, a 2:1 ratio of butter to a neutral oil like canola or grapeseed oil is the sweet spot. For instance, if a recipe calls for 1 cup (226g) of butter, I’ll use 2/3 cup (150g) butter and 1/3 cup (75g) oil. The butter still delivers that irresistible dairy richness, but the oil, being 100% fat and liquid at room temperature, significantly boosts fudginess and helps keep the brownies moist for longer. This might seem counter-intuitive if you’re chasing ‘pure butter flavor,’ but the difference in texture is so profound that it’s worth the trade-off. The oil also contributes to a tender crumb by interfering with gluten development, preventing a chewy, tough texture.
Moreover, ensure your butter is melted, not just softened. Melting the butter fully allows it to coat the sugar crystals more effectively, contributing to that desirable crackly top and dense texture. Cold or softened butter, even creamed with sugar, incorporates more air, leading to a cakier result. This simple fat adjustment, understanding that the type and state of your fat directly impact the final texture, was a revelation for my brownie game.
The Gentle Emulsification: Building Your Batter for the Best Texture
Many recipes jump straight to creaming butter and sugar, or just mixing everything together. For fudgy brownies with that perfect crackly crust, you need to think about emulsification – how fats and liquids combine. My method involves gently warming the butter and sugar together, then incorporating the eggs one by one, rather than all at once.
Start by melting your butter (or butter/oil blend) gently over low heat or in a microwave until just melted, not simmering. Immediately stir in your granulated sugar. The residual heat from the melted fat will slightly dissolve the sugar crystals. This creates a denser, more liquid base, discouraging air incorporation. Once this mixture is slightly cooled but still warm to the touch (around 100-110°F or 38-43°C), whisk in your eggs. But here’s the crucial part: add them one at a time, whisking vigorously for at least 30-60 seconds after each addition. This allows the lecithin in the egg yolks to emulsify the fat and sugar, creating a thick, glossy, ribbon-like batter. This emulsion traps moisture and contributes significantly to both the fudgy texture and the shiny, crackled top that’s the hallmark of a truly great brownie.
Contrast this with just dumping everything in: you’ll get a thinner, less cohesive batter that struggles to hold its structure, resulting in a drier, more open crumb. The painstaking minute per egg might feel tedious, but it’s a non-negotiable step for truly spectacular brownies.
The Anti-Cake Strategy: Minimizing Gluten Development
When you think ‘cake,’ you think fluffy and airy, right? That’s largely due to gluten development from flour and air incorporated during mixing. For brownies, we want the exact opposite: dense, fudgy, and chewy. This means consciously minimizing gluten development, which is typically achieved by avoiding overmixing your dry ingredients once they meet the wet.
Once your emulsified wet ingredients are ready, sift in your dry ingredients (flour, cocoa powder, salt, leavening if any, though many fudgy brownie recipes use minimal or no leavening). Do not use an electric mixer at this stage. Use a rubber spatula and fold gently, only until no dry streaks of flour remain. The moment you see the last bit of flour disappear, stop. Seriously, stop. Any extra stirs develop gluten, which creates elasticity and chewiness – great for bread, terrible for fudgy brownies. The more you mix, the more your brownies will lean towards a cakey, spongy texture, a direct path to chalky disappointment.
This also means using all-purpose flour or even a low-protein cake flour, if you want to be extra precise. High-protein bread flour is your enemy here. And if you’re using a lot of cocoa powder, make sure it’s a good quality Dutch-processed cocoa. Dutch-processed cocoa is less acidic and interacts differently with flour, further inhibiting gluten formation and providing a darker, richer chocolate flavor without drying out the crumb.
The Precision Bake: Doneness is a Feel, Not a Time
Baking brownies correctly is less about following a strict timer and more about understanding the visual and tactile cues of doneness. Overbaking is the single fastest way to turn a potentially fudgy brownie into a dry, chalky wasteland. In my kitchen, a slightly lower temperature and a shorter bake time are key.
I typically bake fudgy brownies at 325°F (160°C) instead of 350°F (175°C). This allows the edges to set without becoming crispy while the center slowly bakes to fudgy perfection. The precise bake time will vary dramatically based on your pan material, oven calibration, and specific recipe, but generally, a 9x13 inch pan takes about 25-30 minutes, and an 8x8 or 9x9 inch pan can be 30-35 minutes. Always err on the side of underbaking, as they will continue to set as they cool.
Here’s my definitive test: gently shake the pan. The edges should be set, but the center should still have a slight wobble, like barely set gelatin. If you insert a toothpick into the center, it should come out with moist crumbs, not wet batter, but definitely not dry. Dry means overbaked. Once they’re out of the oven, let them cool completely in the pan on a wire rack. This is crucial. Hot brownies are structurally delicate and continue to cook from residual heat. Cutting them too soon leads to crumbling and a less fudgy texture. Patience is a virtue here, delivering a superior result.
Frequently Asked Questions
Q: My brownies still feel cakey even after trying these tips. What else could be wrong?
A: If your brownies are still cakey, double-check your flour measurements. Too much flour is a common culprit. Ensure you’re spooning flour into your measuring cup and then leveling it off, rather than scooping directly, which compacts the flour and adds too much. Also, re-evaluate your mixing of dry ingredients – even a few extra folds can overdevelop gluten.
Q: Can I use brown sugar for fudgier brownies?
A: Yes, absolutely! Brown sugar, with its molasses content, adds more moisture and chewiness. I often use a mix of granulated and light brown sugar (e.g., 50/50) to enhance both fudginess and flavor complexity. Just ensure it’s still part of the warmed butter/sugar step for optimal emulsification.
Q: Why do my brownies always stick to the pan, even with parchment paper?
A: This can happen if your parchment paper isn’t hanging over the edges sufficiently, or if you’re not greasing the exposed sides of the pan. I always line my pan with parchment paper, leaving an overhang on two sides like a sling, and then lightly grease the exposed metal edges of the pan with baking spray. This ensures easy removal and clean edges.
Q: How can I prevent my crackly top from disappearing?
A: The crackly top is a result of rapidly drying the top layer of sugar-rich batter. The key is thorough emulsification of sugar and eggs in a slightly warm fat mixture, creating a stable meringue-like layer. Avoid opening the oven door too frequently during the first two-thirds of baking, as sudden temperature drops can collapse this delicate crust.
Q: Can I use different types of chocolate for my fudgy brownies?
A: Absolutely, and it’s encouraged! Using a mix of unsweetened cocoa powder, semi-sweet chocolate chips, and even some chopped dark chocolate chunks will add layers of deep, complex chocolate flavor and varying textures, contributing to a truly decadent and fudgy experience. Just ensure the primary source of chocolate is good quality.
Conclusion
Transforming your brownies from chalky disappointments to fudgy masterpieces isn’t about magic; it’s about mastering a few key principles. By understanding the role of fat ratios, embracing gentle emulsification, meticulously avoiding overmixing, and recognizing the true signs of doneness, you’ll unlock a world of rich, dense, and intensely chocolatey perfection. These aren’t just tips; they’re the foundational shifts that changed my entire baking approach, and I’m confident they’ll do the same for you. So next time you crave a brownie, remember these insights, and prepare for a truly sublime, fudgy experience.
Written by Lena Petrova
home organization & sustainable living
A veteran journalist with an eye for practical solutions and a passion for simplifying complex topics.
You Might Also Like
Why Your Homemade Pizza Crust Isn't Crispy (And The Pro Secrets That Deliver Pizzeria-Quality Crunch Every Time)
Tired of soggy pizza crust? Discover the common mistakes that steal your crunch and the pro secrets to achieve a perfectly crispy, pizzeria-quality crust at home.

Why Your Home Still Feels Stuffy (Even with Windows Open) — And What Actually Works for Real Fresh Air
Discover why opening windows isn't enough for fresh air and the hidden culprits making your home stuffy. Get expert tips for real air quality.
Why Your Homemade Bread Is Dry and Crumbly (And The Simple Shifts That Guarantee Light, Airy Perfection Every Time)
Stop making dense, dry bread! Discover the crucial shifts in ingredients and technique that guarantee light, airy, and moist homemade loaves.