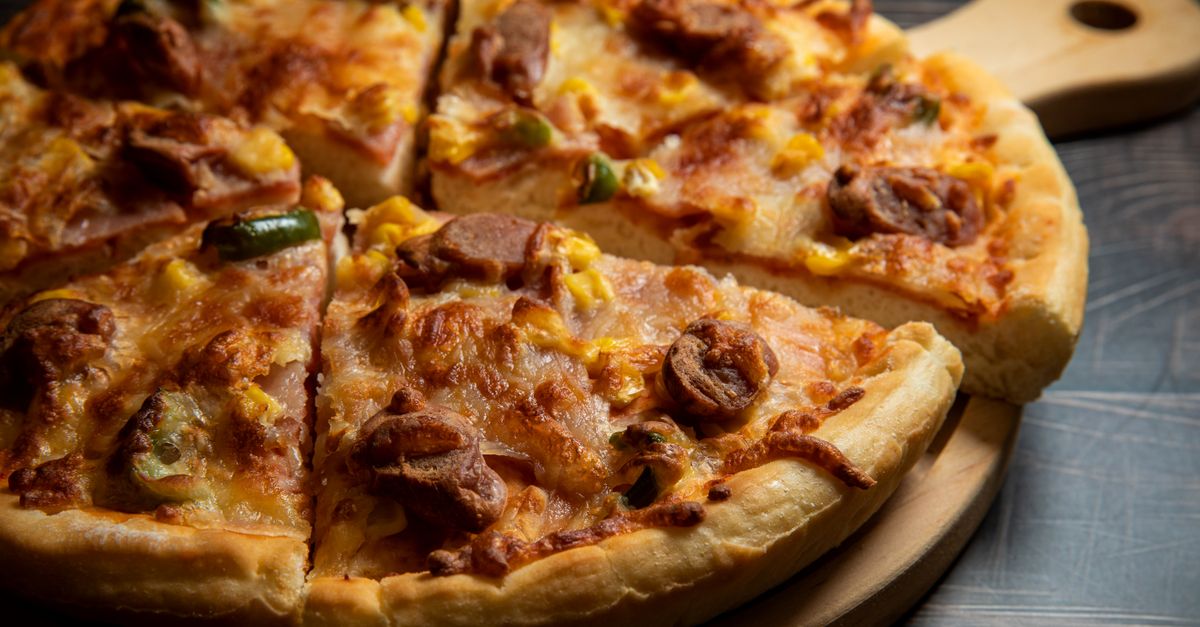
Why Your Homemade Pizza Crust Isn't Crispy (And The Pro Secrets That Deliver Pizzeria-Quality Crunch Every Time)
There’s nothing quite like the anticipation of homemade pizza night. You roll out the dough, pile on your favorite toppings, and slide it into the oven, dreaming of that perfect, golden-brown crust with a satisfying crunch. But too often, that dream quickly turns into a disappointing reality: a soggy, pale, or chewy crust that just doesn’t live up to your pizzeria fantasies.
I’ve been there. For years, my homemade pizzas were delicious in flavor but lacked that essential structural integrity and crispy bite. It was frustrating to put so much effort into a meal only to have the foundation fall flat, literally. I tried various recipes, different types of flour, and endless temperature adjustments. What I discovered, through a lot of trial and error (and a few burnt edges), is that achieving a truly crispy pizza crust isn’t about one magic ingredient, but a combination of often-overlooked techniques and an understanding of how heat and moisture interact with dough. It’s about creating an environment where the dough can crisp, not just cook.
Most home bakers focus on the toppings or the sauce, assuming the crust is just, well, the crust. But the secret to that coveted crunch lies in mastering the fundamentals of heat transfer, moisture management, and the right baking surface. Once I started applying these professional kitchen insights, my homemade pizza transformed. It went from a good effort to a showstopper, complete with that irresistible crunch that makes you want to devour every last bite.
Key Takeaways
- High heat and a preheated baking surface (stone or steel) are non-negotiable for rapid crisping.
- Minimize dough moisture and toppings to prevent steaming and allow the crust to dry out and crisp.
- Strategic placement and timing in the oven create the ideal cooking environment for a perfectly crispy base.
- A short rest after baking releases steam, preventing sogginess and locking in the crunch.
The Low-Heat, Short-Preheat Trap: Why Your Oven Isn’t Hot Enough
One of the most pervasive mistakes I see home pizza makers make is underestimating the importance of extreme heat and proper preheating. A typical home oven maxes out at 500-550°F, which, while hot, is still far from the 800-900°F of a professional pizza oven. To compensate for this, you need to maximize every degree your oven can offer, and that starts with thorough preheating, often for much longer than you think.
Think about it: a pizza cooks in just a few minutes in a professional oven. This rapid cooking is what creates that beautiful char and crispy crust before the toppings burn. When your oven is too cool, the dough slowly bakes, giving off moisture that steams the crust instead of drying it out to a crisp. This leads to a pale, soft base.
In my experience, simply setting the oven to 500°F (or its maximum) and waiting for the preheat light to ding isn’t enough. That light only tells you the air around the heating element has reached temperature. What you really need is for your baking surface – your pizza stone or steel – to be screaming hot. A good rule of thumb is to preheat your oven with your chosen baking surface inside for at least 45 to 60 minutes after the oven reaches its set temperature. This allows the thermal mass of the stone or steel to absorb and radiate intense, consistent heat directly into the bottom of your crust, mimicking the floor of a professional pizza oven. This initial burst of intense heat is the single most critical factor in achieving crispiness. Without it, your crust will struggle to dry out and firm up.
The Topping Overload and Wet Dough Blunder
Another common culprit behind a soggy crust is excess moisture, whether from the dough itself or from overly generous, wet toppings. Pizza dough should be hydrated enough to be pliable, but an overly wet dough can turn gummy and resist crisping. Similarly, a mountain of sauce, too much fresh mozzarella (which releases a lot of water), or watery vegetables like mushrooms or tomatoes, will effectively steam your crust from the top down.
I learned this the hard hard way. My initial enthusiasm for toppings always led to a beautiful-looking pizza that, once sliced, flopped limply. The mistake I see most often is treating pizza like a casserole where more is always better. For a truly crispy crust, less is often more when it comes to toppings. Think about your favorite pizzeria – they apply toppings judiciously, ensuring each ingredient has its moment without overwhelming the crust.
To combat this, I now measure my sauce (about 1/4 to 1/3 cup for a 12-inch pizza), use lower-moisture mozzarella (either shredded low-moisture whole milk mozzarella or even part-skim, or fresh mozzarella that has been pressed dry with paper towels for at least 30 minutes). If I’m using watery vegetables, I’ll pre-sauté them to remove excess liquid or spread them very sparingly. Also, consider the hydration of your dough. While some high-hydration doughs can be crispy, for home ovens, a dough in the 60-65% hydration range is generally more forgiving for achieving that consistent crunch. If your dough feels overly sticky and slack, reduce the water slightly next time, or add a bit more flour during the final shaping to absorb surface moisture.
The Wrong Baking Surface and Launch Technique
The surface you bake on and how you launch your pizza are crucial, yet often overlooked, elements. Baking directly on a cold metal pan or a thin baking sheet will never give you the same intense, immediate heat transfer as a pizza stone or steel. A pizza stone absorbs heat slowly and radiates it evenly, while a pizza steel (my personal preference) heats up faster and retains heat even better, delivering an even more powerful thermal shock to the dough.
For years, I used a flimsy baking sheet, wondering why my crusts were always pale and soft on the bottom. The moment I invested in a high-quality pizza steel, everything changed. The rapid heat transfer from the steel to the dough causes the moisture in the dough to rapidly turn to steam, creating those desirable air pockets and a wonderfully crisp exterior.
Beyond the surface itself, your launch technique is paramount. If your pizza sticks to the peel, you risk a disastrous, misshapen mess that not only looks bad but also unevenly cooks. The key is ample semolina flour (or a mix of semolina and all-purpose flour) on your pizza peel. Semolina acts like tiny ball bearings, allowing the pizza to slide off smoothly. Don’t be shy with it, especially if your dough is a bit sticky. Work quickly from the moment you stretch the dough onto the peel to when you launch it. The longer it sits, the more likely it is to absorb the flour and stick. A quick, confident shove from the peel onto the screaming hot stone/steel ensures minimal heat loss and immediate crisping action.
Uneven Oven Heat and Premature Removal
Many home ovens have notoriously uneven heat distribution. You might notice one side of your oven browns faster than the other, or the top browns quicker than the bottom. This unevenness can lead to a crust that’s crispy in some spots and still soft in others. Furthermore, pulling the pizza out too soon, even if the toppings look done, can leave residual moisture in the crust, leading to a quick turn to sogginess as it cools.
What changed everything for me was actively managing the pizza’s position in the oven. Instead of just setting a timer, I now pay close attention. About halfway through the cooking time (roughly 3-4 minutes for a thin-crust pizza), I use my peel to rotate the pizza 180 degrees. This ensures both sides of the crust get equal exposure to the hottest parts of the oven and brown evenly. For thicker crusts or those needing extra bottom crisping, I sometimes gently lift the pizza with the peel and place it directly on the oven rack for the last minute or two, allowing direct heat to hit the bottom. This needs to be done with extreme caution to avoid burning, and only if the crust is already firm enough to handle it.
Another crucial step: resist the urge to cut it immediately. Once out of the oven, place your pizza on a wire cooling rack (not a solid cutting board). This allows air to circulate around the bottom of the crust, preventing condensation and releasing residual steam. Waiting 2-3 minutes before slicing allows the crust to set and crisp up even further, ensuring that satisfying crunch lasts. Premature slicing traps steam, making the crust soft and doughy again.
Frequently Asked Questions
Q: Do I really need a pizza stone or steel for a crispy crust?
A: Yes, it’s highly recommended. A preheated pizza stone or steel provides the intense, direct heat transfer to the dough that a regular baking sheet simply cannot. This rapid initial cooking is crucial for crisping the bottom of the crust. A pizza steel heats faster and retains heat better than a stone, offering superior crisping in my experience.
Q: My pizza dough is sticking to the peel. What am I doing wrong?
A: You’re likely not using enough semolina flour (or a mix of semolina and all-purpose flour) on your peel. Semolina acts like tiny ball bearings, preventing sticking. Also, work quickly once the dough is on the peel and topped – the longer it sits, the more likely it is to absorb moisture and stick. A quick, confident launch is key.
Q: Can I use fresh mozzarella for a crispy crust?
A: You can, but it requires an extra step. Fresh mozzarella has a high water content. To avoid a soggy crust, blot the fresh mozzarella thoroughly with paper towels for at least 30 minutes before adding it to your pizza. Some even recommend tearing it into small pieces and letting it drain in a colander for a while. Low-moisture shredded mozzarella is generally a safer bet for crispiness.
Q: My oven doesn’t get very hot. Can I still get a crispy crust?
A: It’s more challenging, but not impossible. Maximize the heat you do have by preheating your oven (with your stone/steel inside) for at least 45-60 minutes beyond when it signals it’s preheated. Use the thinnest crust possible, go very light on wet toppings, and consider placing the pizza directly on the oven rack for the last minute or two (if the crust is firm enough) to get direct heat on the bottom.
Q: Why does my pizza get soggy after it cools?
A: This is usually due to residual moisture trapped in the crust, often from steam. Always transfer your hot pizza to a wire cooling rack immediately after baking, rather than a solid cutting board. This allows air to circulate around the bottom, letting steam escape and preventing condensation that leads to sogginess. Wait a few minutes before slicing.
By addressing these common pitfalls and embracing these pro secrets, you’re not just making pizza; you’re crafting an experience. That unmistakable crunch transforms a simple meal into something truly special. So next time, don’t just bake a pizza – engineer a crispy masterpiece. Your taste buds (and your family) will thank you.
Written by Lena Petrova
home organization & sustainable living
A veteran journalist with an eye for practical solutions and a passion for simplifying complex topics.
You Might Also Like
Why Your Homemade Brownies Are Chalky (And The Simple Shifts That Guarantee Fudgy Perfection Every Time)
Stop settling for dry, chalky brownies. Discover the precise shifts in ingredients and technique that guarantee rich, fudgy brownies every single time.

Why Your Home Still Feels Stuffy (Even with Windows Open) — And What Actually Works for Real Fresh Air
Discover why opening windows isn't enough for fresh air and the hidden culprits making your home stuffy. Get expert tips for real air quality.
Why Your Homemade Bread Is Dry and Crumbly (And The Simple Shifts That Guarantee Light, Airy Perfection Every Time)
Stop making dense, dry bread! Discover the crucial shifts in ingredients and technique that guarantee light, airy, and moist homemade loaves.