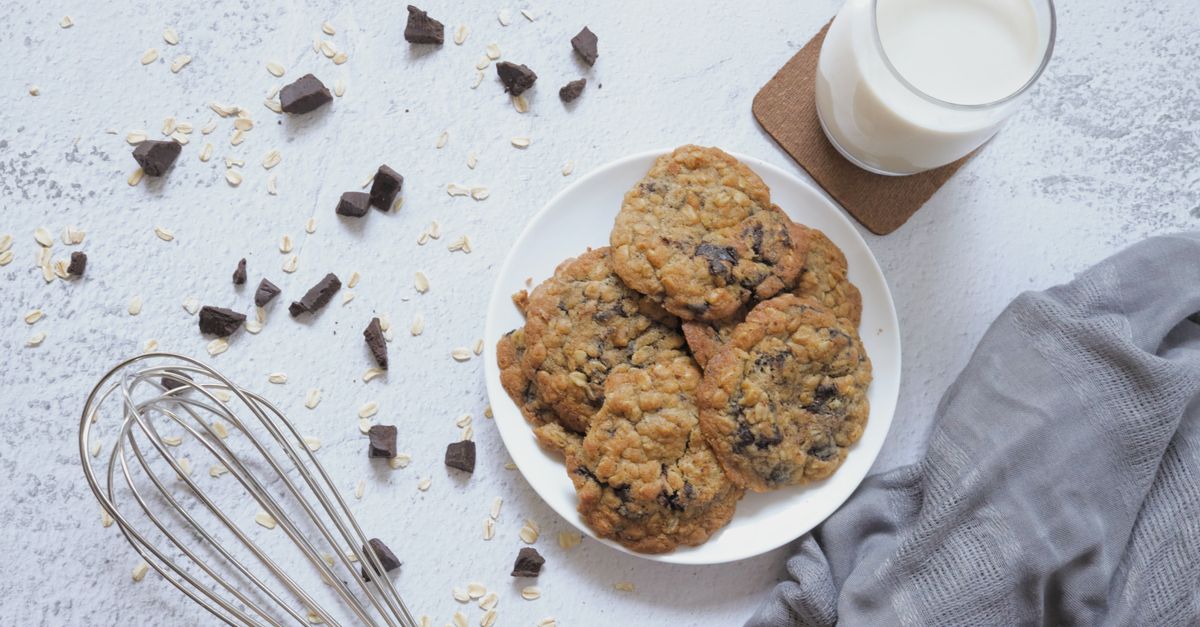
Why Your Homemade Cookies Are Flat (And The Simple Fixes That Guarantee Perfect, Puffy Results Every Time)
You’ve pictured it: golden-brown edges, a perfectly soft and chewy center, and that irresistible, slightly domed top that screams ‘homemade goodness.’ But time after time, you pull your cookies out of the oven, and what do you get? Flat, greasy discs that spread into a single, unappetizing sheet. If you’re like me, you’ve probably blamed the recipe, the oven, or even yourself, tossing entire batches in frustration. I know the feeling – I spent years trying to figure out why my chocolate chip cookies looked like sad pancakes, no matter how carefully I measured. It felt like a culinary conspiracy!
What changed everything for me wasn’t a secret ingredient or a fancy new gadget, but understanding the fundamental science behind why cookies spread. It’s not just about temperature; it’s about a delicate balance of fat, flour, leavening, and technique. Once I started paying attention to these overlooked culprits, my cookies transformed from flat disappointments to consistently puffy, bakery-worthy delights. Trust me, you don’t need to be a pastry chef to master this. You just need to know the right tricks.
Key Takeaways
- Too much butter, or butter that is too soft, is the number one culprit behind excessively flat cookies.
- Always chill your cookie dough for at least 30 minutes to solidify fats and prevent premature spreading.
- Use a combination of baking soda and baking powder for optimal lift and chewiness.
- Measuring flour by weight (using a kitchen scale) is crucial to avoid adding too much or too little.
The Overlooked Villain: Butter Temperature and Quantity
The mistake I see most often, and one I made for years, is mishandling the butter. Most recipes call for “softened” butter, and many home bakers interpret this as butter that’s practically melted. This is your first major pitfall. Butter that is too soft or slightly melted is the primary reason your cookies are spreading too much. Think of butter as the structural framework for your cookie. When it’s too warm, it melts too quickly in the oven, causing the cookie to collapse before the flour and leavening agents have a chance to set its structure.
In my experience, ‘softened’ butter should be cool to the touch, leaving a slight indentation when pressed, but not going all the way through. It should hold its shape. If your finger sinks easily, it’s too warm. To achieve this, take your butter out of the fridge about 30-45 minutes before baking, depending on your room temperature. Don’t microwave it! That creates unevenly softened butter with pockets of melted fat.
The second butter-related culprit is too much butter. While butter equals flavor, an excess will inevitably lead to flatter cookies. If you’ve tinkered with a recipe and added an extra tablespoon or two ‘for good measure,’ that might be why your cookies are failing. Always stick to the exact measurements given in the recipe. If you’re consistently getting flat cookies from a trusted recipe, try reducing the butter by just 1-2 tablespoons. This small adjustment can significantly improve structure without sacrificing flavor.
The Chilling Secret: Why Cold Dough is Your Best Friend
This tip might sound like an extra step you want to skip, but I promise you, chilling your cookie dough is a game-changer. This isn’t just about making the dough easier to handle; it’s a critical step in preventing excessive spread and developing flavor.
When you chill cookie dough, several things happen:
- Fats solidify: The butter in your dough firms up. When these solid fat molecules hit the hot oven, they take longer to melt, giving the flour, eggs, and leavening agents more time to set the cookie’s structure before it spreads out. This results in thicker, chewier cookies.
- Flour hydrates: The flour particles absorb moisture from the wet ingredients. This leads to a more cohesive dough and a tender, more flavorful cookie texture. Think of it like pasta absorbing water – it changes its structure.
- Flavors meld: This is a bonus, but chilling allows the various ingredients to fully integrate, deepening the flavor profile. Your chocolate chip cookies will taste more ‘chocolatey’ and complex.
In my kitchen, I aim for a minimum of 30 minutes of chilling time, but often go for an hour or even overnight. For best results, portion out your cookie dough balls before chilling them. This way, you can bake directly from the fridge. If you chill the whole bowl, it will take longer for the dough to firm up, and it will be harder to scoop evenly later. This simple step can turn your flat cookie woes into puffy triumphs.
The Leavening Lesson: Balancing Baking Soda and Baking Powder
Leavening agents are the unsung heroes of puffy cookies, responsible for creating that delightful rise and tender crumb. However, many home bakers either use the wrong type or the wrong amount, leading to flat results. I’ve experimented extensively with baking soda and baking powder, and what I’ve learned is that a balanced approach often yields the best texture.
- Baking soda (sodium bicarbonate) needs an acid to activate. Common acidic ingredients in cookie dough include brown sugar, buttermilk, sour cream, and sometimes even natural cocoa powder. When activated, it produces carbon dioxide gas, which creates rise and a chewier texture. Too much baking soda without enough acid can leave a metallic taste and cause excessive spread as it over-alkalinizes the dough.
- Baking powder is a complete leavening agent, meaning it contains both a base (baking soda) and an acid, plus a buffer (usually cornstarch). Most baking powders are double-acting, meaning they get a small lift when mixed with liquid and a second, more powerful lift when exposed to oven heat. This provides a more consistent, upward rise and a cakier texture.
Many classic cookie recipes use only baking soda, especially those with brown sugar, which is acidic. However, for that ultimate puffy, chewy texture, I’ve found that a combination of baking soda and baking powder often works wonders. For example, in a standard chocolate chip cookie recipe, if it calls for 1 teaspoon of baking soda, I might try 1/2 teaspoon of baking soda and 1/2 teaspoon of baking powder. This slight adjustment gives a more reliable lift, especially if your brown sugar isn’t as acidic as it should be, or if you’re using alternative sweeteners. Always ensure your leavening agents aren’t expired; old leaveners lose their potency, leading to predictably flat cookies.
The Flour Factor: Why Proper Measurement Matters (Seriously)
Measuring flour might seem straightforward, but it’s arguably the most critical measurement in baking, and the most common source of error for flat cookies. I used to scoop flour directly from the bag with my measuring cup, leveling it off with a knife. What I didn’t realize was that I was compacting the flour, adding significantly more than the recipe intended. This excess flour makes your dough too stiff, resulting in cookies that don’t spread enough and end up dense or crumbly.
Conversely, if you’re too light-handed or your flour is particularly airy, you might be adding too little flour. This reduces the structural integrity of your dough, leading to cookies that spread excessively and become very flat and greasy. It’s a delicate balance.
The only truly accurate way to measure flour is by weight, using a kitchen scale. If a recipe calls for 250g of flour, that’s exactly what you should aim for. If your recipe only provides cup measurements, I strongly recommend using the “spoon and level” method:
- Fluff up the flour in its container with a spoon.
- Gently spoon the flour into your measuring cup until it’s overflowing.
- Use the back of a knife or a straight edge to level off the top. Do NOT tap the cup or pack the flour down.
This method helps prevent over-measurement. Investing in a simple kitchen scale, which typically costs less than $20, will be one of the best baking decisions you ever make. It removes guesswork, ensures consistency, and will dramatically improve the results of all your baked goods, not just cookies. After I started weighing my flour, my cookie results became consistently perfect.
Baking Sheet Material and Oven Temperature Consistency
Beyond ingredients, the actual baking environment plays a significant role in how your cookies turn out. For years, I used flimsy, dark-colored baking sheets and wondered why some cookies burned while others stayed pale, and why they often spread unevenly. What I learned is that your baking sheet material and your oven’s true temperature consistency are silent but powerful influencers on cookie flatness.
Baking Sheet Material:
- Dark-colored pans absorb more heat, leading to faster browning and often more spread on the bottom before the top has a chance to set. This can result in crispy, thin cookies or even burnt bottoms.
- Light-colored, heavy-gauge aluminum baking sheets (often labeled ‘half sheet pans’) are ideal. They reflect heat, ensuring a more even bake and consistent browning, giving your cookies time to rise and set properly before spreading too much. Avoid non-stick pans if you can, as their dark coating can mimic the issues of dark pans.
- Parchment paper or silicone baking mats are your friends. They prevent sticking and provide an additional layer of insulation, further promoting even baking and minimizing spread.
Oven Temperature Consistency: Most home ovens are not calibrated perfectly. A setting of 350°F might actually be 325°F or 375°F. An oven that’s too cool will cause your cookies to spread excessively because the butter melts slowly, and the dough remains fluid for too long before the structure sets. An oven that’s too hot can brown the outsides too quickly, leaving the inside raw or uneven.
Invest in an oven thermometer. It’s a simple, inexpensive tool that clips onto your oven rack and gives you the true temperature. If your oven is consistently off by more than 10-15 degrees, you’ll need to adjust your baking temperature accordingly. Preheat your oven for at least 15-20 minutes after it reaches the set temperature to ensure the entire oven, and especially the racks, are fully heated. This consistent, accurate heat is crucial for that perfect cookie rise and texture.
Don’t Overmix: The Gluten Dilemma
We’ve all heard it: “Don’t overmix your cookie dough.” But do you really understand why? This isn’t just a suggestion; it’s a crucial directive that impacts your cookie’s texture and can contribute to flatness. When you overmix, you develop gluten, and while gluten is great for chewy bread, it’s not what you want for a perfectly tender, puffy cookie. I learned this the hard way, thinking more mixing meant a smoother, more uniform dough.
Here’s the science:
- Gluten Development: Flour contains proteins that, when hydrated and agitated (mixed), form gluten. The more you mix, the more these gluten strands develop, making the dough elastic and tough. For cookies, this translates to a less tender texture and can also lead to more spread because a tough dough resists rising and tends to flatten out more.
- Air Incorporation (and Loss): Initial creaming of butter and sugar is designed to incorporate air, which contributes to the cookie’s rise and light texture. However, once the flour is added, excessive mixing can deflate this trapped air, resulting in a denser, flatter cookie.
The rule of thumb I live by is: mix until just combined. Once you add the dry ingredients to the wet, mix on low speed or by hand until there are no visible streaks of flour. As soon as the flour disappears, stop. If you’re adding chocolate chips or other mix-ins, fold them in gently at the very end. Overmixing is a silent killer of cookie texture, turning what should be a delicate treat into a dense disc. Trust the process, and resist the urge to keep mixing ‘just a little more.’
Frequently Asked Questions
Q: My cookies are still flat even after chilling the dough. What else could be wrong?
A: If chilling isn’t solving the problem, re-evaluate your butter. Is it truly cool-to-the-touch softened, or closer to room temperature/melted? Also, double-check your flour measurement (preferably by weight). Too little flour (or too much butter) will still cause spread even with chilled dough. Finally, ensure your baking soda and/or baking powder are fresh and not expired.
Q: How can I tell if my baking soda or baking powder is still good?
A: To test baking soda, mix 1/4 teaspoon with 2 tablespoons of vinegar. It should fizz vigorously. For baking powder, mix 1/2 teaspoon with 2 tablespoons of warm water. It should also fizz immediately. If there’s little to no reaction, it’s time to replace them.
Q: What’s the ideal temperature for ‘softened’ butter?
A: Softened butter should be around 65-68°F (18-20°C). It should be pliable but still cool to the touch. When you press it, your finger should make an indentation, but not sink all the way through easily. If it’s warmer, it will melt too quickly in the oven.
Q: Should I use cold eggs or room-temperature eggs for cookies?
A: Always use room-temperature eggs when a recipe calls for them, and for cookies that require creaming butter and sugar. Room-temperature eggs emulsify better with the butter and sugar, creating a smoother batter that traps more air. This trapped air is crucial for a lighter, puffier cookie texture.
Q: Can I use brown sugar instead of white sugar to make cookies chewier and thicker?
A: Yes, brown sugar contributes to a chewier, moister cookie because it contains molasses, which is slightly acidic and hygroscopic (attracts moisture). Replacing some or all of the white sugar with brown sugar can definitely help with chewiness and a slightly thicker texture, especially due to its acidity interacting with baking soda. Just be mindful of the overall sweetness and moisture balance of the recipe.
Q: My cookies always burn on the bottom but aren’t cooked through. What’s happening?
A: This is a classic sign of using a dark-colored baking sheet. Dark pans absorb more heat and transfer it quickly to the bottom of the cookies, causing them to burn before the rest of the cookie bakes through. Switch to a light-colored, heavy-gauge aluminum baking sheet, and always use parchment paper or a silicone mat. Also, check your oven temperature with an oven thermometer; it might be running too hot.
Embrace the Puffy Cookie Revolution
Breaking free from the cycle of flat, disappointing cookies is more than just a baking triumph; it’s a testament to understanding the subtle science behind everyday tasks. I’ve been there, staring at a tray of spread-out discs, wondering where I went wrong. But by focusing on the crucial details—the true temperature of your butter, the power of chilling dough, the right leavening balance, and the precision of flour measurement—you’re not just baking better cookies, you’re becoming a more confident, intuitive baker.
It’s time to stop guessing and start creating. Try implementing just one or two of these changes with your next batch. You’ll be amazed at the transformation. Once you experience that perfectly puffy, chewy cookie, you’ll wonder how you ever settled for anything less. Go ahead, reclaim your cookie destiny – your taste buds will thank you!
Written by Lena Petrova
home organization & sustainable living
A veteran journalist with an eye for practical solutions and a passion for simplifying complex topics.
You Might Also Like

Why Your Homemade Pizza Crust Isn't Crispy (And The Pro Secrets That Deliver Pizzeria-Quality Crunch Every Time)
Tired of soggy pizza crust? Discover the common mistakes that steal your crunch and the pro secrets to achieve a perfectly crispy, pizzeria-quality crust at home.
Why Your Homemade Brownies Are Chalky (And The Simple Shifts That Guarantee Fudgy Perfection Every Time)
Stop settling for dry, chalky brownies. Discover the precise shifts in ingredients and technique that guarantee rich, fudgy brownies every single time.

Why Your Home Still Feels Stuffy (Even with Windows Open) — And What Actually Works for Real Fresh Air
Discover why opening windows isn't enough for fresh air and the hidden culprits making your home stuffy. Get expert tips for real air quality.