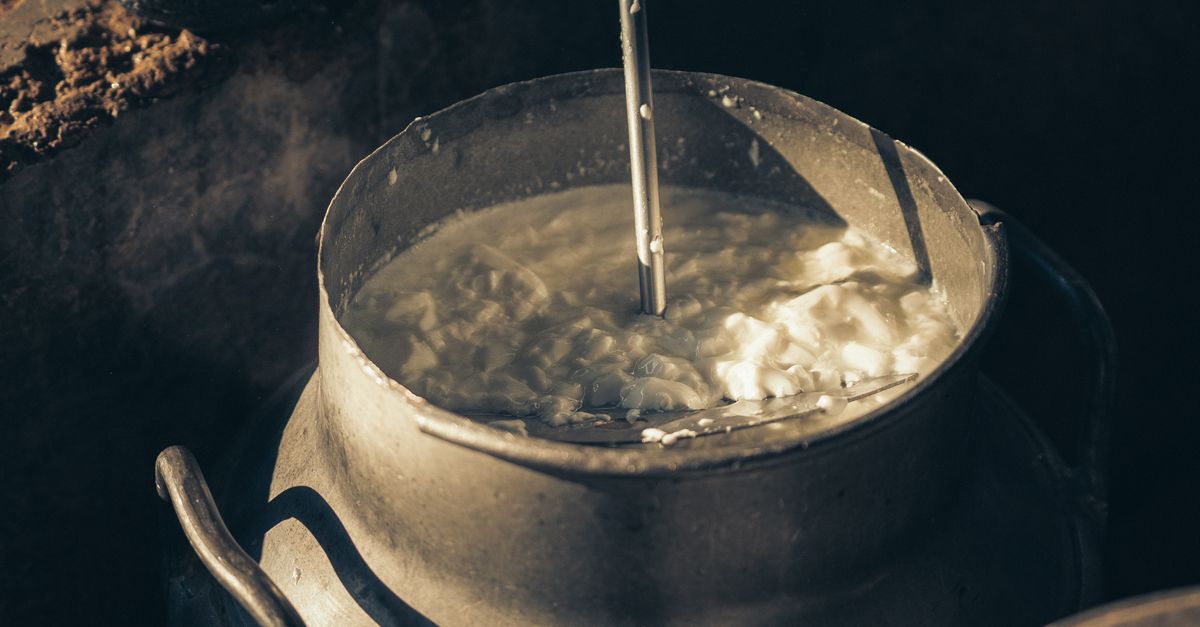
Why Your Homemade Yogurt Isn't Thick and Creamy (And The Pro Secrets That Guarantee Perfect Texture Every Time)
Are you tired of making homemade yogurt that turns out thin, runny, or just plain disappointing? I’ve been there. For years, my attempts at creamy, store-bought-quality yogurt ended in a watery mess, despite following recipes to the letter. It felt like a culinary conspiracy, especially when everyone online raved about how ‘easy’ it was. The truth is, while the process of making yogurt is simple, achieving that elusive thick and creamy texture consistently requires understanding a few critical, often overlooked, details. It’s not about magic; it’s about science, patience, and a few pro adjustments that changed everything for me.
What I’ve learned through countless batches and extensive experimentation is that the most common advice often misses the nuances that truly matter. It’s not just about milk and culture; it’s about temperature precision, protein content, and the gentle art of culturing. Once I grasped these principles, my watery woes vanished, replaced by consistently luscious, thick yogurt that rivals any premium brand. Let me share the insights that transformed my yogurt-making game, so you can stop pouring out thin batches and start enjoying the rich, satisfying reward of truly creamy homemade yogurt.
Key Takeaways
- Start with high-protein milk or fortify your milk to significantly improve yogurt thickness.
- Achieve precise temperature control during heating and culturing to support robust bacterial growth and proper protein coagulation.
- Allow ample culturing time, ideally 10-12 hours, for the cultures to fully develop flavor and texture.
- Strain your finished yogurt gently to remove excess whey, concentrating the solids for a thicker consistency.
- Avoid disturbing the yogurt during the culturing process to prevent disrupting the delicate protein matrix.
The Protein Problem: Why Your Milk Choice Matters More Than You Think
When I first started making yogurt, I assumed any whole milk would do. What a mistake! The single biggest factor influencing your yogurt’s final thickness is the protein content of your milk. Most standard milks (even whole milk) have around 3.2-3.5% protein. While this is fine for drinkable yogurt, it’s simply not enough to create that luscious, spoon-standing-up texture we crave. This was my first major revelation. I kept trying to fix the process, when the real issue was my primary ingredient.
The mistake I see most often is using standard milk without fortification. Think about store-bought Greek yogurt—it’s incredibly thick because it starts with a higher concentration of milk solids, especially protein. When the beneficial bacteria in your starter culture consume lactose, they produce lactic acid, which causes the milk proteins (casein) to coagulate and thicken. More protein means more material to coagulate, leading to a firmer set.
What changed everything for me was fortifying my milk. I now exclusively use ultra-filtered milk (like Fairlife) which naturally has significantly higher protein (often 13g-14g per cup compared to 8g in regular milk). This alone made a dramatic difference. If ultra-filtered milk isn’t available or preferred, you can easily fortify your own milk. The simplest way is to add 1/4 to 1/2 cup of non-fat dry milk powder per half-gallon of liquid milk. Whisk it in thoroughly before heating. This boosts the protein and solids without altering the liquid content too much. Another option, though more advanced, is to gently reduce your milk volume by simmering it down by about 10-15% before culturing, which concentrates the existing proteins. In my experience, the dry milk powder method is the easiest and most effective for consistent results.
Temperature Precision: Your Yogurt’s Silent Architect
If you’re cavalier with your temperatures, your yogurt will be, too. Precise temperature control during both the heating and culturing phases is absolutely non-negotiable for thick, creamy yogurt. This was my second major learning curve. I used to just eyeball it or rely on vague instructions, and my results were wildly inconsistent.
First, heating the milk to 180-185°F (82-85°C) is crucial. This step denatures the whey proteins in the milk, preventing them from interfering with the casein coagulation and allowing them to integrate into the protein matrix, which contributes to a firmer set. If you don’t heat it enough, these whey proteins stay free-floating and can lead to a thinner, sometimes even grainy, texture. Overheating can also be an issue, as it can scorch the milk and impart off-flavors.
After heating, you must cool the milk down to 110-115°F (43-46°C) before adding your starter culture. This is the optimal temperature range for most yogurt cultures to thrive. If the milk is too hot, it will kill the beneficial bacteria, and your yogurt won’t set at all. Too cold, and the bacteria will be sluggish, leading to a weak set and prolonged culturing time. I cannot stress enough the importance of an accurate digital thermometer here. It’s the single best investment you can make for consistent yogurt. Don’t guess; measure.
Finally, maintaining a consistent culturing temperature of 110-115°F (43-46°C) for the duration of the fermentation is key. Any significant drops or fluctuations will slow bacterial activity and compromise the set. This is why tools like an Instant Pot (on yogurt setting), a dedicated yogurt maker, or even an oven with the light on (if it holds the right temp) are invaluable. My personal preference is the Instant Pot’s yogurt function; it’s a set-it-and-forget-it solution that delivers perfect temperature stability every time.
Time and Tranquility: The Art of Patient Culturing
After getting my milk and temperatures right, my next challenge was patience. I was often too eager, checking and moving my yogurt too much. Culturing time and undisturbed fermentation are critical, yet so often underestimated. Most recipes will give a range, say 4-8 hours. In my experience, for a genuinely thick and tangy yogurt, 10-12 hours is often ideal, sometimes even up to 14-16 hours.
The longer the cultures work, the more lactic acid they produce, and the firmer the protein matrix becomes. This also develops a more pronounced flavor. Shortchanging this time means you’ll end up with thinner, milder yogurt. The precise timing will depend on your starter culture’s activity and your desired tanginess and thickness, but don’t be afraid to push past the minimum recommended time.
Crucially, do not disturb the yogurt during culturing. I mean it. No peeking, no shaking, no moving the container unnecessarily. The coagulating proteins form a delicate network, and any jostling can break these bonds, resulting in a thin, watery product, sometimes with pockets of whey. It’s like baking a cake – you don’t open the oven door every five minutes. Set it up in its warm environment, and walk away. Trust the process.
The Strain Game: Concentrating Your Creation
Even with perfectly cultured yogurt, a little extra straining can transform it from merely thick to gloriously creamy, especially if you’re aiming for a Greek-style consistency. This was the final piece of my yogurt puzzle that elevated my homemade batches to true perfection. Straining removes excess whey, which is the yellowish liquid that separates from the solids.
Here’s my simple, effective straining method: Once your yogurt is fully cultured and has been chilled for at least 4-6 hours (chilling helps set the proteins firmly before straining), line a colander with a few layers of cheesecloth or a clean, thin kitchen towel. Place the colander over a bowl to catch the whey, and spoon your chilled yogurt into the lined colander. Cover it loosely with plastic wrap and place it back in the refrigerator. The amount of time you strain will determine the final texture:
- 1-2 hours: Slightly thicker, closer to a regular European-style yogurt.
- 3-5 hours: Greek-style thickness, perfect for dipping or spreading.
- 6-8+ hours: Super thick, almost like cream cheese or labneh, excellent for savory applications.
Check the consistency periodically. You’ll be amazed how much liquid comes out! The whey isn’t waste, by the way; it’s rich in nutrients and can be used in smoothies, baking, or even to water plants. Just be gentle when scooping the yogurt into the cheesecloth and when checking it, to avoid compacting it too much.
The Culture Catalyst: Choosing and Maintaining Your Starter
Your starter culture is the living engine of your yogurt, and its quality directly impacts your final product. I’ve experimented with many, and not all cultures are created equal, nor are they maintained equally.
First, choose a high-quality starter. You have a few options:
- Store-bought plain yogurt: Look for a brand that explicitly states it contains “live and active cultures” and has a short ingredient list (milk and cultures). Avoid anything with added sugars, fruit, or stabilizers. My best results have come from using a very thick, high-protein plain Greek yogurt as my starter. I usually pick one with multiple strains listed. This is a cost-effective way to get started.
- Direct-Set Starter Cultures: These are powdered cultures, often available online or in specialty stores, that you use once. They’re great for consistent results and if you don’t want to maintain a mother culture. Some are specifically designed for thicker yogurt.
- Heirloom/Mesophilic Cultures: These culture at room temperature and allow for continuous re-culturing. While convenient, they often produce a thinner yogurt than thermophilic (heat-loving) cultures unless you strain them significantly.
Once you have a good starter, consistency is key. I always reserve a small amount (1-2 tablespoons per quart of milk) from my freshest batch of homemade yogurt to start my next batch. This is called reculturing. However, the potency of the culture weakens over successive generations. In my experience, after about 5-7 recultures, my yogurt starts getting thinner and less tangy. That’s when I know it’s time to refresh with a new store-bought starter or a direct-set packet. Don’t try to stretch a weak culture; it’s a recipe for thin yogurt.
Storage Savvy: Protecting Your Hard Work
After all that effort, the last thing you want is for your perfect yogurt to go bad or lose its texture. Proper storage is often an afterthought, but it’s crucial for longevity and maintaining that ideal consistency.
Once your yogurt is cultured and strained to your liking, transfer it to clean, airtight containers. Glass jars or BPA-free plastic containers work best. This prevents it from absorbing odors from the fridge and minimizes exposure to air, which can encourage spoilage.
Store your yogurt in the coldest part of your refrigerator, typically the back of the bottom shelf. The colder temperature significantly slows down bacterial activity, preserving its texture and preventing it from becoming overly sour. In my experience, properly stored homemade yogurt will last for 1.5 to 2 weeks, sometimes even longer. If you notice a thin layer of whey collecting on top, simply stir it back in; this is normal separation and doesn’t mean your yogurt has gone bad. If the smell changes significantly or you see mold, it’s time to discard it. By paying attention to these small storage details, you’ll maximize the enjoyment of every thick, creamy spoonful you’ve so carefully crafted.
Frequently Asked Questions
Q: Why is my homemade yogurt watery, even after culturing for a long time?
A: Watery yogurt often points to insufficient protein in your milk, improper culturing temperature, or disturbing the yogurt during fermentation. Ensure you’re using high-protein milk (or fortifying it with dry milk powder), maintaining a consistent 110-115°F culturing temperature, and letting the yogurt ferment undisturbed for 10-12 hours.
Q: Can I use skim milk to make thick yogurt?
A: While technically possible, skim milk has much lower fat content and often lower protein than whole milk, making it inherently harder to get a thick, creamy texture. You’ll need to heavily fortify skim milk with non-fat dry milk powder (at least 1/2 cup per half-gallon) and potentially strain it for a longer duration to achieve comparable thickness. Whole milk or ultra-filtered milk is generally recommended for the best results.
Q: My yogurt is gritty or lumpy. What went wrong?
A: Gritty or lumpy yogurt can be a sign of uneven heating or cooling of the milk, or the starter culture not being fully dissolved before adding it to the milk. Ensure your milk is thoroughly whisked after adding dry milk powder, heated to 180-185°F uniformly, and then cooled to 110-115°F before you gently whisk in your starter until completely smooth. Aggressive stirring after adding the starter can also break down the protein matrix.
Q: How do I prevent my yogurt from becoming too sour?
A: The tanginess of your yogurt increases with longer culturing times. If you prefer a milder flavor, reduce the culturing time (e.g., to 6-8 hours), but be aware this may result in a slightly thinner yogurt. Chilling the yogurt promptly after culturing also halts the fermentation process, preventing further souring. If your yogurt is consistently too sour, your starter culture might be overly active, or your culturing temperature might be slightly too high.
Q: What can I do with the leftover whey from straining yogurt?
A: Don’t discard it! Whey is nutritious and versatile. You can use it in smoothies, replace water in baking (bread, pancakes, muffins), use it as a base for soups or stews, or even as a fermenting starter for vegetables. It’s also great for watering acid-loving plants like blueberries.
Conclusion
Making truly thick and creamy homemade yogurt isn’t an act of culinary genius, but rather a mastery of a few specific, critical details. By understanding the profound impact of milk protein content, embracing temperature precision, practicing patience during culturing, and employing the simple technique of straining, you can transform your yogurt-making efforts from frustrating failures to consistent successes. These aren’t just tips; they are the fundamental pillars that underpin every successful batch of luscious yogurt. Go forth, measure accurately, be patient, and prepare to enjoy the creamiest homemade yogurt you’ve ever tasted. Your mornings (and snack times) will thank you!
Written by Lena Petrova
home organization & sustainable living
A veteran journalist with an eye for practical solutions and a passion for simplifying complex topics.
You Might Also Like

Why Your Homemade Pizza Crust Isn't Crispy (And The Pro Secrets That Deliver Pizzeria-Quality Crunch Every Time)
Tired of soggy pizza crust? Discover the common mistakes that steal your crunch and the pro secrets to achieve a perfectly crispy, pizzeria-quality crust at home.
Why Your Homemade Brownies Are Chalky (And The Simple Shifts That Guarantee Fudgy Perfection Every Time)
Stop settling for dry, chalky brownies. Discover the precise shifts in ingredients and technique that guarantee rich, fudgy brownies every single time.

Why Your Home Still Feels Stuffy (Even with Windows Open) — And What Actually Works for Real Fresh Air
Discover why opening windows isn't enough for fresh air and the hidden culprits making your home stuffy. Get expert tips for real air quality.